 DIY
DIY
Everything You Need to Start Making Your Own Jewelry
I used to think that if I wanted to make anything more sophisticated than a friendship bracelet, I’d need a dedicated studio, a jeweler’s loupe, and a bank account that didn’t hurt to look at. I spent way too much time scrolling through endless tutorials that required $200 worth of specialized equipment just to make a simple pair of earrings. But here’s the truth about diy jewelry making: you don’t need a professional workshop or a massive budget to create something that actually looks intentional. You just need to stop overcomplicating the process and focus on the few essential tools that actually do the heavy lifting.
In this guide, I’m stripping away the fluff and the expensive “must-have” lists that most hobbyist sites try to sell you. I’m going to show you the exact, streamlined steps to get started with diy jewelry making using basic supplies you can find without breaking the bank. We’ll cover the fundamental movements, the minimal tool kit you actually need, and how to avoid the common mistakes that make handmade pieces look cheap. My goal is to get you through the learning curve quickly so you can stop researching and start creating.
Table of Contents
Guide Overview
Tools & Supplies
- Needle-nose pliers for gripping and bending wire
- Wire cutters for trimming metal and cord
- Beading mat to prevent rolling
- Assorted glass or wooden beads (1 pack)
- Jewelry wire or elastic cord (1 spool)
- Jewelry findings including clasps and jump rings (1 set)
Step-by-Step Instructions
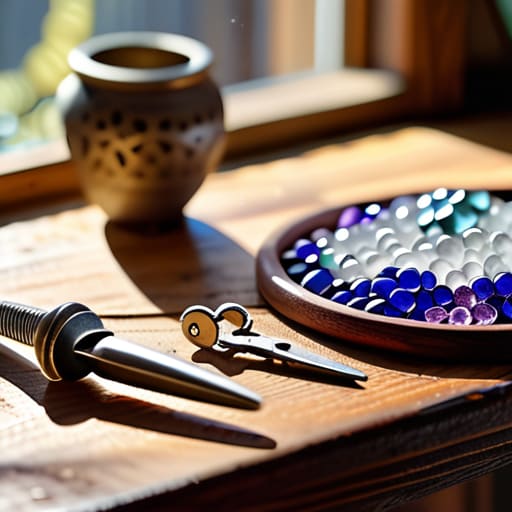
- 1. First, clear some space on your table and gather your basic kit. You don’t need a professional workbench, but you do need a pair of needle-nose pliers, wire cutters, and a bead mat (or even just a piece of felt) so your supplies don’t roll away mid-project. Grab a small tray to keep your beads organized; nothing kills my momentum faster than hunting for a single tiny pearl in a pile of chaos.
- 2. Pick your “foundation” material. If you’re making a necklace, you’ll likely want something sturdy like jewelry wire or a pre-made chain. If you’re going the bracelet route, elastic cord is your best friend for a low-stress start. Just make sure you measure it twice before you start stringing; there is nothing more frustrating than finishing a piece only to realize it’s too tight to actually wear.
- 3. Start the stringing process by following a pattern. I like to keep things simple at first—think about the rhythm of colors or textures. Lay your beads out on your mat in the exact order you want them to appear before you actually thread them. This prevents that “wait, that looks weird” moment halfway through the piece, saving you the headache of unstringing everything to fix a mistake.
- 4. Secure your ends so the whole thing doesn’t fall apart the moment you put it on. If you’re using wire, you’ll need to create “loops” using your pliers. This is the part where most people get intimidated, but it’s really just about consistent practice. Once the loop is formed, slide on a crimp bead and press it down firmly with your pliers to lock everything in place.
- 5. Add your hardware. This is where the piece actually becomes “jewelry” rather than just a string of beads. Attach your clasps, jump rings, or earring hooks. I always recommend using a small pair of pliers to gently open jump rings by twisting them sideways rather than pulling them apart; if you pull them open like a “C,” they’ll never close properly again, and your hard work will end up on the floor.
- 6. Do a final quality check. Hold the piece up to the light and give it a gentle tug to make sure your crimps are tight and your knots are secure. If everything feels solid, you’re done. Clean up your workspace immediately—it’s much easier to find that one specific bead tomorrow if you don’t leave it buried under a mountain of scrap wire tonight.
The Only Jewelry Making Tools for Beginners You Actually Need
Look, I’ve seen enough “starter kits” on Amazon to know they’re mostly just colorful filler. You don’t need a massive tackle box of gadgets to start seeing results. If you’re just starting out, focus on a solid set of pliers—specifically needle-nose, round-nose, and side cutters. These are the heavy lifters for almost every jewelry making techniques you’ll try. I usually keep mine in a small pouch right next to my multi-tool because, honestly, once you start working with wire, you’ll realize how much you rely on having the right grip.
Beyond the pliers, don’t go overboard on the aesthetics yet. Instead of buying every color of glass imaginable, invest in a few high-quality essential bead supplies like sterling silver or gold-filled crimp beads and some decent nylon thread. It’s much better to make three pieces that actually last than twenty pieces that fall apart the moment you hit a doorway. If you can master the basics of tension and securing your knots, you’ll find that quality beats quantity every single time.
Stop Guessing With Essential Bead Supplies and Simple Techniques
Once you’ve got your basic tools laid out, the next hurdle is usually the sheer volume of options at the craft store. It’s easy to get overwhelmed by the rows of glass, stone, and plastic, but here’s my advice: don’t try to buy everything at once. Start with a few sets of essential bead supplies that actually complement each other, like a handful of matte black stones and some gold-toned spacers. This keeps your initial costs low and ensures that whatever you create actually looks cohesive rather than like a random collection of leftovers.
When it comes to the actual assembly, don’t feel like you need to master complex jewelry making techniques on day one. If you’re looking for a quick win, focus on how to make beaded bracelets using simple elastic cord or a basic crimp bead method. It’s the fastest way to see a finished product without the frustration of high-level tension issues. If you eventually want to level up, you can dabble in a simple wire wrapping tutorial to add some structure, but for now, just focus on getting the rhythm down and enjoying the process.
Five Pro-Tips to Save Your Sanity (and Your Neck)
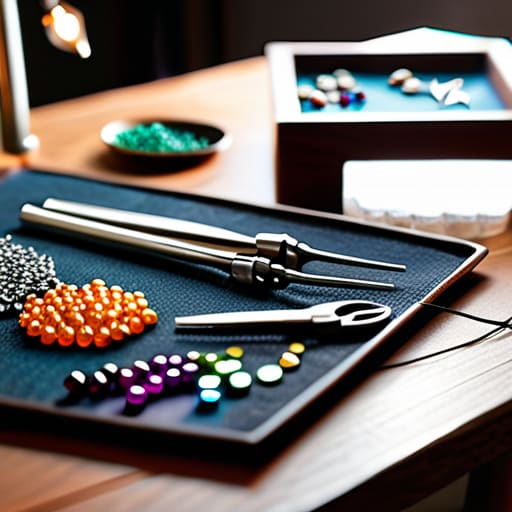
- Don’t buy the “all-in-one” kits. They usually come with a mountain of cheap, flimsy beads you’ll never use and tools that feel like toys. It’s better to buy a small handful of high-quality components that actually look good against your skin.
- Test your tension before you commit. I’ve wasted way too much time on a beautiful beaded bracelet only to realize it’s so tight it won’t go over my hand. Always string a few beads on your cord first to check the “give” before you start sealing the ends.
- Work on a bead mat or a piece of felt. This isn’t just for organization; it’s a lifesaver. If you’re working on a hard kitchen table or a desk, one wrong move and your entire project is rolling under the fridge.
- Keep your lighting intentional. You don’t need a professional studio, but trying to thread a tiny jump ring under a dim living room lamp is a recipe for a headache. Grab a decent desk lamp so you aren’t squinting your eyes out.
- Learn the “one-tool rule” for troubleshooting. If a clasp isn’t working or a wire is bending weirdly, stop and check your tool. Most beginners try to force things with their fingers, which usually just results in bent wire and frustration. Use the pliers.
The Bottom Line
Don’t let the massive aisles of craft stores intimidate you; start with a handful of basic tools and just enough supplies to finish your first piece.
Focus on mastering a few simple techniques—like basic stringing and knotting—before you even think about buying expensive specialized equipment.
The goal isn’t perfection; it’s about creating something functional and personal without turning a relaxing hobby into an expensive, cluttered chore.
## The Philosophy of Making
“Don’t get caught up in the idea that you need a professional studio to create something meaningful; you just need a few decent tools and the willingness to stop overthinking it and start making.”
Julian Reese Miller
Just Start Making Things
At the end of the day, you don’t need a professional workshop or a mountain of expensive gemstones to create something beautiful. We’ve covered the essentials: grabbing a few reliable tools, picking out beads that actually work with your vision, and mastering those foundational techniques that keep your pieces from falling apart. The biggest hurdle isn’t your skill level or your budget; it’s the tendency to overcomplicate the process before you’ve even strung your first bead. By keeping your toolkit lean and your supplies intentional, you’ve already bypassed the most frustrating part of the learning curve.
My advice is to stop waiting for the “perfect” moment or the “perfect” set of supplies to arrive. Jewelry making is a skill that you earn through trial, error, and a little bit of patience. Don’t sweat the small mistakes—maybe a knot looks a little loose or a color combo is slightly off—just keep moving forward. The goal isn’t to become a master jeweler overnight; it’s to reclaim your creativity and enjoy the process of making something with your own two hands. Now, put the guide away, clear off your kitchen table, and just see what happens.
Frequently Asked Questions
How do I keep my jewelry from tangling or breaking after I've made it?
Nothing kills the momentum of a new project like a tangled mess of necklaces or a snapped clasp. To keep things intact, focus on tension and storage. When assembling, always double-check your crimp beads; if they aren’t tight, the structural integrity is gone. For storage, ditch the cluttered jewelry box. Use a dedicated hanging organizer or even a simple corkboard with hooks. Keeping pieces separated prevents that frustrating “birds nest” effect that ruins your hard work.
Is there a way to make these look professional rather than "homemade"?
The secret to moving past that “craft kid” look is all in the finishing touches. Most homemade jewelry looks amateur because of loose ends or uneven tension. Invest in decent crimp beads and use a pair of real needle-nose pliers to tuck your wire ends tightly. Also, don’t skimp on the clasps; a sturdy, high-quality lobster claw makes a world of difference. It’s about the details that make the piece feel intentional, not accidental.
Where is the best place to find decent materials without spending a fortune?
Look, don’t fall into the trap of buying those massive, overpriced “all-in-one” starter kits from big-box craft stores. They’re mostly filler. If you want the good stuff without the markup, start with Etsy for unique finds or dive into specialized sites like Fire Mountain Gems. For the basics, even local flea markets or thrift stores can yield incredible vintage beads. Keep it intentional: buy only what you’ll actually use.