 DIY
DIY
Effective Homemade Cleaning Supplies You Can Make Yourself
I used to think that a clean apartment required a cabinet full of neon-colored liquids that smelled more like a laboratory than a home. I’d spend way too much money on “specialized” sprays for every single surface, only to realize I was basically paying for fancy packaging and a massive marketing budget. It’s a total scam. The truth is, most of those expensive, branded cleaners are just overpriced water with a bit of scent, and you don’t need a chemistry degree to get your space spotless. I learned the hard way that making your own diy cleaning products isn’t some complicated weekend project; it’s just about using what you already have to stop wasting money.
I’m not here to give you a twenty-step ritual involving essential oils that cost more than your groceries. My goal is to give you the exact, stripped-back formulas that actually work on grease, grime, and dust so you can get the job done and get back to your life. I’ve tested these combinations in my own cramped kitchen and on my vintage gear, and I’m sharing only the no-nonsense essentials that save you time and cash.
Table of Contents
Cost Effective Cleaning Hacks That Actually Save You Money
Look, I used to spend way too much on those neon-colored sprays that promise to kill 99.9% of everything. Most of the time, I was just paying for fancy packaging and a marketing budget. If you want to stop bleeding money, start by looking in your pantry. The most powerful cost-effective cleaning hacks don’t come in a spray bottle; they come in a box of baking soda or a gallon of white vinegar. For example, a simple mixture of vinegar and water is my go-to for windows and mirrors. It’s cheap, it works, and it saves me from that “chemical smell” that lingers in my apartment for hours.
If you have pets or kids running around, this approach is a total game-changer. Switching to non-toxic household cleaners isn’t just about being “green”—it’s about knowing exactly what’s touching your floors. You can level up your scents without the massive price tag by adding a few drops of lemon or eucalyptus essential oils for cleaning. It makes your place smell like a spa instead of a laboratory, and it costs pennies per use.
The Magic of Vinegar and Baking Soda Cleaning
If you ask me, the most underrated duo in any cleaning arsenal is just plain old vinegar and baking soda. I used to buy these specialized, expensive sprays for every single surface in my apartment, but I eventually realized I was just paying for fancy packaging and heavy scents. Now, I rely on these two because they are the ultimate non-toxic household cleaners. Vinegar is your go-to for cutting through grease and dissolving mineral deposits on faucets, while baking soda acts as a gentle abrasive that tackles grime without scratching your surfaces.
The real trick is knowing how to use them together without making a mess. If you have a stubborn stain in your sink or a smelly drain, sprinkle the baking soda first, then hit it with a splash of vinegar. The fizzing reaction does most of the heavy lifting for you. If the smell of vinegar is a dealbreaker for you, I highly recommend adding a few drops of essential oils for cleaning, like lemon or eucalyptus. It makes the whole process feel less like a chore and more like a quick, effective reset for your home.
Five Pro-Tips to Keep Your DIY Cleaning Game Sharp
- Don’t go overboard with the scents; essential oils are great for a fresh smell, but use them sparingly so you aren’t turning your apartment into a literal aromatherapy clinic.
- Invest in a few decent glass spray bottles rather than cheap plastic ones; they last longer, don’t leach chemicals into your mixtures, and look a lot better sitting on your counter.
- Always label your bottles immediately with a permanent marker or a label maker—trust me, you do not want to be playing “guess the liquid” with a mystery spray six months from now.
- Test your homemade concoctions on a small, inconspicuous corner of a surface first, especially if you’re working with natural stone or delicate wood.
- Keep your supplies in one organized bin or caddy; if you have to hunt for your vinegar and microfiber cloths every time you clean, you’re going to lose momentum and skip it altogether.
The Bottom Line on DIY Cleaning
Stop buying single-use plastic bottles for every room; most of what you need can be made from three or four basic pantry staples.
Don’t overcomplicate the process—you don’t need a lab setup, just a few effective ingredients and a little bit of common sense.
Focus on the results, not the ritual; the goal is a clean home without spending your entire weekend (or your entire paycheck) on chores.
The Philosophy of a Clean Home
“You don’t need a cabinet full of expensive, neon-colored chemicals to get the job done; you just need a few smart ingredients and the confidence to stop overcomplicating the process.”
Julian Reese Miller
Cutting Through the Noise
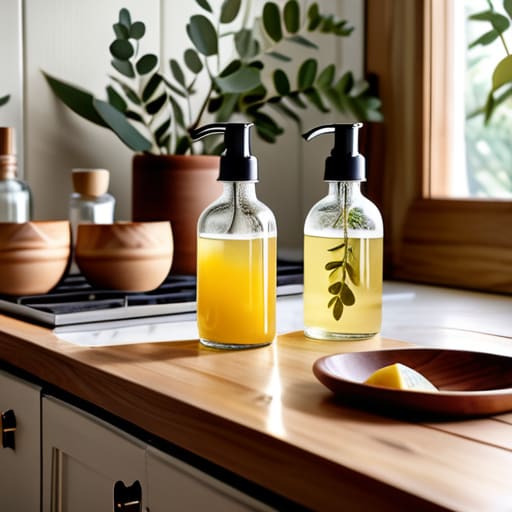
At the end of the day, you don’t need a cabinet full of specialized, overpriced sprays to keep your space in order. We’ve covered how a few pantry staples like vinegar, baking soda, and some basic essential oils can tackle everything from greasy stovetops to grimy bathroom tiles. By swapping out those chemical-heavy bottles for these simple, effective alternatives, you aren’t just saving a significant chunk of change every month—you’re also stripping away the unnecessary complexity of your cleaning routine. It’s about working smarter, not harder, and realizing that efficiency is often found in the basics.
I know it can feel like just one more thing to manage when you’re already juggling a million tasks, but I promise that once you get these few recipes down, they become second nature. You don’t have to do everything at once; just pick one surface to tackle this weekend and see how it feels. The goal isn’t to become a DIY expert or a professional cleaner; it’s to reclaim your time and your peace of mind by mastering the small things. Get your supplies ready, get the job done, and then get back to actually living your life.
Frequently Asked Questions
Are there any specific surfaces, like marble or granite, that I should avoid cleaning with vinegar?
Short answer: Yes, stay far away from marble, granite, or any natural stone. Vinegar is an acid, and that acid will literally eat away at the sealant and etch the surface of your stone. It’ll leave permanent, dull spots that are a nightmare to fix. For those high-end counters, stick to warm water and a drop of mild dish soap. It’s simple, it’s safe, and it won’t ruin your kitchen.
How long can I actually store these homemade mixtures before they lose their effectiveness or start smelling weird?
Look, I get it—the last thing you want is a cabinet full of science experiments that smell like a dumpster. My rule of thumb? If it’s just vinegar and water, you’re fine for a few months. But if you’re adding essential oils or lemon peels, keep it to two weeks. Once it starts smelling funky or looks cloudy, toss it. It’s not worth the risk. Just mix small batches as you need them.
Is it safe to mix these DIY ingredients with the store-bought cleaners I already have under my sink?
Short answer: No. Don’t do it. I know the instinct to “boost” your cleaners, but mixing DIY stuff like vinegar with store-bought products can trigger some nasty chemical reactions. For example, mixing bleach with vinegar creates toxic chlorine gas—definitely not something you want in a small apartment. Stick to one or the other. Clean with your DIY mix, rinse thoroughly, and then use your commercial stuff if you really need it. Safety first.