 DIY
DIY
A Simple Step-by-step Guide to Making Your Own Soap
I remember standing in the middle of my first apartment, staring at a $12 bar of “artisanal” lavender soap and feeling like I’d been played. It looked pretty, sure, but the ingredient list was a mile long and half of it felt like chemical filler. I realized then that most people think you need a laboratory or a massive budget to get high-quality products, but that’s just not true. Learning how to make soap isn’t about mastering complex organic chemistry; it’s about understanding a few basic, reliable steps so you can stop overpaying for stuff you don’t actually need.
I’m not going to bore you with twenty different methods or suggest you buy a specialized kiln. Instead, I’m going to show you the most efficient way to get from raw ingredients to a finished, usable bar without wasting your entire weekend. We’ll cover the essential gear, the safety basics you actually need, and a straightforward process that works every single time. My goal is to get you through this quickly and correctly so you can reclaim your time and your budget.
Table of Contents
Guide Overview
Tools & Supplies
- Digital scale for precise measurements
- Immersion blender to emulsify oils and lye
- Heat-resistant glass beaker or stainless steel pot
- Silicone soap molds for easy removal
- Coconut oil (approx. 500g)
- Olive oil (approx. 500g)
- Sodium hydroxide/Lye (approx. 140g)
- Distilled water (approx. 330g)
- Essential oils (30ml for scent)
Step-by-Step Instructions
- 1. First things first, you need to gather your gear. Don’t try to wing this with kitchen tools you actually use for dinner; you’ll want a dedicated set of stainless steel or heavy-duty plastic bowls, a digital scale (precision is everything here), and a stick blender. Since we’re playing with lye, please grab some safety goggles and gloves. I keep mine in my utility drawer, and trust me, you don’t want to find out why they’re necessary the hard way.
- 2. Weigh out your oils and fats first. Most beginner recipes use a mix of olive oil for moisture and coconut oil for that much-needed lather. Use your digital scale to get the grams exactly right; eyeballing measurements is a recipe for disaster when you’re dealing with saponification. Once they’re weighed, melt your solid fats in a heat-safe container before mixing them with your liquid oils.
- 3. Now, let’s handle the lye solution. This is the part that makes people nervous, but if you follow the rule—always add the lye to the water, never the other way around—you’ll be fine. Pour your measured lye into your distilled water slowly. It’s going to get hot and release some fumes, so do this in a well-ventilated area or right by an open window. Set it aside to cool down to a comfortable temperature.
- 4. Once your oils and your lye water have cooled down to roughly the same temperature (aim for somewhere between 90°F and 110°F), it’s time to combine them. Pour the lye solution into your oil container. This is where the magic happens, but it requires a little elbow grease. Use your stick blender to pulse and stir the mixture. You’re looking for “trace,” which is basically when the mixture reaches the consistency of thin pudding.
- 5. If you want to get fancy, this is the moment to add your extras. I usually throw in a few drops of essential oil for scent or even some dried botanicals if I’m feeling artistic. Just make sure you stir these in thoroughly with a spatula so they don’t just clump up in one spot. Remember, simplicity usually wins here, so don’t go overboard with twenty different scents.
- 6. Pour the finished batter into your mold. If you’re using a silicone mold, it’s easy; if you’re using a wooden box, make sure you’ve lined it with parchment paper first. Tap the mold firmly on the counter a few times to force out any trapped air bubbles that might leave unsightly holes in your bars.
- 7. Cover the mold and let it sit undisturbed in a cool, dry place for about 24 to 48 hours. Once it feels firm to the touch, pop it out of the mold and slice it into bars using a sharp knife. But don’t go using them in the shower just yet. You need to let those bars “cure” on a shelf for about four to six weeks. This allows the water to evaporate, resulting in a harder, longer-lasting bar that won’t turn into mush the second it hits the water.
Mastering Cold Process Soap Making Methods Without the Stress
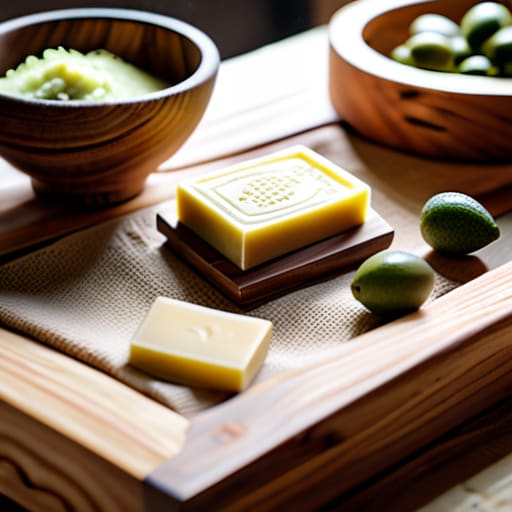
Once you’ve got the basic steps down, the real fun—and the real learning curve—starts with tweaking your recipe. When exploring different cold process soap making methods, I’ve found that the biggest mistake people make is trying to change too many variables at once. If you’re used to a specific coconut oil ratio, don’t suddenly swap it for shea butter and add five new scents in the same batch. Start small. If you want to elevate your bars, focus on sourcing high-quality natural ingredients for homemade soap like olive or avocado oil. These additions change the texture and lather, but they’re much easier to manage than complex fragrance profiles.
Speaking of scents, don’t let the aroma drive your whole process. If you’re using essential oils, remember they behave differently than synthetic fragrances when they hit that lye solution. I always suggest testing a small amount first to see if the scent “disappears” or changes during the saponification stage. Most importantly, don’t rush the finish line. The soap curing process explained simply is just a waiting game: your bars need several weeks to harden and mellow out. It’s tempting to slice into them early, but patience is your best tool here.
Essential Lye Safety Precautions to Protect Your Hands and Time
Look, I’m all about efficiency, but there is zero room for cutting corners when you’re dealing with lye. It’s a caustic substance, and while it’s the backbone of most cold process soap making methods, it demands respect. Before you even think about opening that container, make sure you have your soap making safety equipment laid out on the counter: heavy-duty gloves, wrap-around goggles, and long sleeves. I always keep a bottle of white vinegar nearby just in case, though honestly, rinsing with cool running water is your best friend if a splash happens.
I also can’t stress this enough: always add the lye to your water, never the other way around. If you pour water into a pile of lye, it can react violently and splash back at you. It’s a small detail, but it’s the difference between a successful batch and a trip to the emergency room. Once you’ve got the safety basics down, you can focus on the fun stuff, like choosing the right natural ingredients for homemade soap without worrying about your skin. Stay focused, stay protected, and let’s get back to the craft.
Five Pro-Tips to Save Your Sanity (and Your Batch)
- Don’t get fancy with scents right away. Essential oils are great, but they can behave unpredictably during the saponification process. Start with something simple and stable so you don’t end up with a batch that smells like burnt rubber.
- Precision is everything. This isn’t baking where you can “eyeball” the flour. If your scale is off by even a few grams, your soap could end up too soft or, worse, too harsh on the skin. Invest in a decent digital scale and stick to it.
- Embrace the mess, but contain it. You’re going to be working with oils and lye, which means things get sticky. Set up a dedicated “wet zone” on your counter with silicone mats or old newspapers. It makes the cleanup ten times faster when you’re done.
- Patience is your best tool. I know it’s tempting to slice into your soap the second it looks solid, but if you rush the curing process, you’ll end up with a bar that dissolves instantly in the shower. Give it the full four to six weeks.
- Keep a “fail log.” If a batch comes out too crumbly or the color turns weird, write down exactly what you did. I’ve learned more from my ruined batches than I ever did from my perfect ones, and it’s the only way to stop making the same mistakes.
The Bottom Line
Don’t let the chemistry scare you off; once you respect the lye and follow the steps, it’s just a predictable process, not a science experiment.
Focus on quality ingredients over fancy molds—a simple, well-made bar will always beat a complicated one that falls apart in a week.
Treat your soap-making space like a workshop; keep it organized and clean from the start so you aren’t spending your entire evening scrubbing up.
The Philosophy of Making
Making your own soap isn’t about mastering complex chemistry; it’s about reclaiming a bit of control over what you put on your skin and realizing that the most useful things in life don’t have to come with a massive price tag or a complicated manual.
Julian Reese Miller
The Bottom Line
At the end of the day, making your own soap is just about managing a few variables and respecting the process. We’ve covered the essential safety protocols for handling lye, the core mechanics of the cold process method, and how to keep your workspace organized so you aren’t cleaning up a disaster for three hours afterward. It might feel like a lot of moving parts right now, but once you get the rhythm down, it becomes a predictable, repeatable system. You don’t need a laboratory setup to get professional results; you just need the right tools, a bit of patience, and the willingness to follow the steps without cutting corners.
My advice? Don’t aim for perfection on your first batch. Your first bar might be a little wonky or the scent might be slightly off, and that is perfectly fine. The goal here isn’t to launch a luxury skincare empire; it’s to reclaim a bit of autonomy over what you actually put on your skin and how you spend your time. Once you realize you can create something this useful from scratch without breaking the bank, the world starts to feel a little less intimidating. Now, go grab your gear, get those measurements right, and get back to living your life.
Frequently Asked Questions
Can I use any kind of oil from my kitchen, or do I need to buy specific ones?
Look, I get the temptation to just raid the pantry, but don’t do it. While you could technically turn olive oil into soap, your kitchen oils aren’t designed for the chemical reaction with lye. If you want a bar that actually lathers and doesn’t turn into a greasy mess after a week, you need to invest in basics like coconut or olive oil specifically for soap making. Stick to the plan; it saves money in the long run.
How long do I actually have to wait before I can use the soap without it being too harsh?
Here’s the reality: you can’t rush this part. Even if the bars look solid, you need to let them cure for at least four to six weeks. I know, it feels like a lifetime when you’re eager to use them, but that waiting period is what allows the water to evaporate and the pH to stabilize. If you jump the gun, the soap will be too harsh on your skin. Patience pays off.
What’s the best way to clean my equipment without ruining it or getting lye residue everywhere?
Look, don’t go scrubbing your gear with a heavy-duty sponge right away. The best move is to let the residue sit in warm, soapy water for a bit to break things down. Once the lye is neutralized, use a plastic scraper to lift the bulk of the soap out—don’t wash it down the drain if you can help it. Then, a quick soak and a thorough rinse with distilled water will keep your equipment pristine.