 DIY
DIY
Tiling Your Own Kitchen Backsplash: a Step-by-step Tutorial
I was standing in my kitchen three years ago, staring at a patch of bare, depressing drywall and a box of subway tiles that felt way too heavy for my confidence levels. I kept telling myself that learning how to tile a backsplash was a job for a professional contractor with a van and a massive invoice, but my bank account—and my desire for a decent cup of coffee in a nice space—had other plans. I realized pretty quickly that the “secret” isn’t some expensive specialized equipment; it’s just about having a solid plan and not letting the small details paralyze you.
I’m not here to sell you on a lifestyle makeover or pretend this is a weekend spa retreat. This guide is about the actual mechanics of the job: how to prep your walls without losing an afternoon, how to avoid those dreaded crooked lines, and how to clean up the mess efficiently. I’m going to walk you through the process with the same pragmatic approach I use when I’m stripping down a vintage synth—no fluff, just the essential steps you need to get the job done right so you can get back to enjoying your kitchen.
Table of Contents
Guide Overview
Tools & Supplies
- Tile cutter or wet saw for cutting tiles
- Notched trowel for spreading adhesive
- Rubber grout float for applying grout
- Spacers to maintain even gaps
- Level to ensure straight lines
- Backsplash tiles (calculate area + 10% extra)
- Tile adhesive or mastic (1 gallon)
- Grout (1 bag)
- Tile sealant (1 bottle)
Step-by-Step Instructions
- 1. First things first, you need to prep the surface. I can’t stress this enough: if your wall is greasy or dusty, nothing is going to stick, and you’ll be ripping tiles off in six months. Grab a sponge and some degreaser, and give that wall a thorough scrub from top to bottom. Once it’s dry, make sure there are no loose bits of paint or crumbling drywall hanging around.
- 2. Grab your tiles and do a “dry run” before you even touch the adhesive. I always find it helpful to lay them out on the counter to see how the pattern looks and where the cuts might end up. You don’t want to get halfway through and realize you’re left with a tiny, awkward sliver of tile at the edge of your countertop.
- 3. Now, it’s time to get messy with the thin-set (that’s the adhesive). Use a notched trowel to spread a layer onto the wall, starting from the bottom and working your way up in small sections. You don’t want to spread the whole wall at once because it’ll start to dry out before you can get the tiles on. Aim for ridges that run in one direction; it helps the air escape so the tiles sit flat.
- 4. Start placing your tiles, beginning with your most visible corner or the area right above the countertop. Use a level to make sure your first row is perfectly straight—if the base row is crooked, the whole kitchen is going to look like it’s sliding downhill. Press each tile into the adhesive with a slight twist to ensure it’s fully seated.
- 5. Don’t forget the spacers. These little plastic bits are your best friend because they keep your grout lines even and prevent you from accidentally squishing tiles together. Space them out at the corners of every tile, and if you’re feeling ambitious, you can use a spacer tool to keep everything uniform as you move upward.
- 6. Once you’ve reached the top or the edges, you’ll likely need to cut some tiles to fit. If you’re doing this on a budget, a simple manual tile cutter works for most ceramic stuff, but if you’re working with something tougher like stone, you might need to rent a wet saw. Take your time with the measurements; a steady hand and a sharp blade make all the difference here.
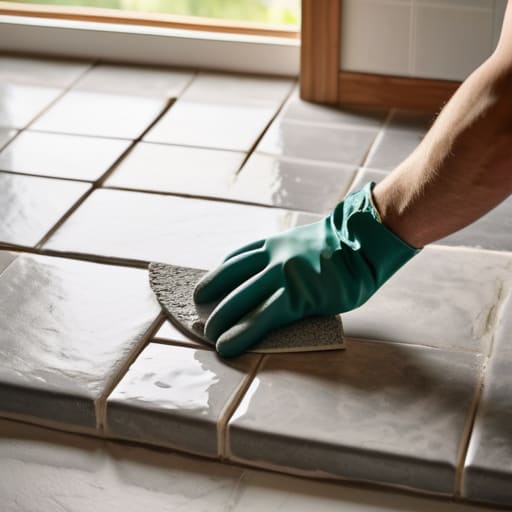
- 7. Let the adhesive cure completely—usually about 24 hours—before you even think about touching the grout. Once it’s set, spread the grout over the tiles using a rubber grout float, pushing it deep into the gaps. After about 15 to 20 minutes, wipe the excess off with a slightly damp sponge. Don’t over-wet it, or you’ll wash the color right out of the grout lines.
The Essential Tiling Tools List for Real People
Look, you don’t need to go out and buy every expensive gadget in the hardware store aisle, but you do need the right basics to keep this from turning into a disaster. My essential tiling tools list starts with a decent notched trowel; if the teeth are too small, your tiles won’t stay put, and if they’re too big, you’ll end up with a mess. I also highly recommend grabbing a few high-quality spacers. They might seem trivial, but they are the only thing standing between a professional-looking finish and a crooked nightmare that will haunt your kitchen every time you make coffee.
While you’re gathering gear, don’t skip the math. I always suggest calculating tile quantity by adding an extra 10% to your total to account for cuts and the occasional accidental breakage. It’s much better to have three tiles left over in a box than to realize you’re one short when the hardware store is already closed. Finally, grab a good sponge and a bucket. You’ll be doing a lot of cleaning once the grout goes in, and having the right setup makes the cleanup feel a lot less like a chore.
Smart Calculating Tile Quantity Hacks to Avoid Extra Trips
There is nothing quite as soul-crushing as being three tiles away from finishing a project, only to realize you’re staring at an empty box and a half-finished wall. I’ve been there, and trust me, it’s a massive time-suck. When you’re calculating tile quantity, the golden rule is to always add a 10-15% buffer. This isn’t just for mistakes; it’s for those inevitable odd cuts around outlets or the occasional tile that arrives chipped in the box. If you’re planning on more complex backsplash layout patterns, like herringbone, bump that buffer up to 20%. It’s much cheaper to have a few leftovers in the garage than to pay for shipping on a single replacement box.
While you’re at the store, don’t just grab the tiles and run. Take a look at your grout samples too. I usually recommend picking a color slightly more muted than you think you want; it’s much more forgiving if your spacing isn’t mathematically perfect. Always buy your entire order at once to ensure the “dye lot” matches. If you buy more later, the color might be slightly off, and that’s a headache you definitely don’t need.
Five Pro-Tips to Save Your Sanity (and Your Backsplash)
- Don’t skip the layout phase. Before you even touch the adhesive, spend some time dry-fitting your tiles on the counter. You don’t want to end up with a tiny, awkward 1-inch sliver of tile in a corner just because you started from the wrong side.
- Keep your grout lines clean from the start. Use a damp sponge to wipe away any excess grout that gets pushed into the gaps while you’re working. It’s much easier to clean a little bit of residue now than to spend an hour scrubbing dried cement off your new tiles later.
- Watch your spacing. Even if you’re going for a “rustic” look, use spacers. If your lines start wandering or getting uneven, the whole kitchen is going to look crooked, and that’s a headache you definitely don’t need.
- Work in small sections. It’s tempting to spread adhesive across the entire wall to “get it over with,” but the glue will start to skin over and lose its grip before you can get the tiles down. Stick to manageable patches so everything stays tacky and secure.
- Protect your counters. Whether you’re working on granite or laminate, lay down some drop cloths or even some cheap cardboard. Tiling is messy, and I’d much rather clean up a bit of dust than try to buff out a scratch on a countertop.
The Bottom Line
Don’t skimp on the prep work; a clean, level surface is the difference between a backsplash that looks professional and one that starts peeling off in six months.
Buy more tile than you think you need—having an extra box on hand saves you a frantic mid-project trip to the store and covers you if you mess up a few cuts.
Focus on the rhythm, not perfection; take your time with the spacers and the grout, and remember that even a slight imperfection is just character in a DIY project.
The Reality of the Project
“Look, your backsplash isn’t going to be a museum piece, and it doesn’t need to be. Don’t let the fear of a crooked line stop you from starting; just focus on one row at a time, keep your grout lines clean, and remember that once the lights are on and the kitchen is done, nobody’s looking for imperfections—they’re just enjoying the space.”
Julian Reese Miller
The Finish Line
Look, once you’ve finished cleaning those grout lines and finally wiped away that last bit of haze, take a second to actually look at what you’ve done. You’ve gone from a bare, intimidating wall to a finished space by following a few logical steps: prepping the surface, laying your tiles with a steady hand, and managing that grout without making a massive mess. It wasn’t about having a professional crew or a specialized degree; it was just about staying organized and taking it one row at a time. You did the math, you gathered the right tools, and you stuck to the process.
At the end of the day, the goal here wasn’t just to get some new ceramic on your kitchen wall—it was to prove to yourself that you can handle the stuff that usually feels out of reach. There’s a specific kind of satisfaction that comes from looking at a room and knowing you built that with your own two hands and a bit of patience. Don’t let the next project intimidate you just because it looks big on paper. Now that you’ve tackled this, you’re already ahead of the game. Go grab a drink, enjoy your upgraded kitchen, and get back to actually living your life.
Frequently Asked Questions
Do I really need to waterproof the wall first, or can I just tile straight over the paint?
Look, I get the temptation to skip the extra step, but don’t just tile over the paint. If that paint is peeling or greasy, your tiles won’t stick, and you’ll be staring at a cracked grout line in six months. If your wall is already in great shape, just give it a deep scrub with TSP and a light sand to help the adhesive grab. If it’s near a sink, though? Use a sealant. It’s worth the extra twenty minutes.
How do I deal with those annoying awkward corners and outlets without making a huge mess?
Look, corners and outlets are where most DIY projects start to feel like a headache, but don’t let them derail you. For outlets, just pull the cover plates off first—don’t try to tile around them while they’re live. For those tricky corners, invest in a decent manual tile nipper. It’s much easier to control than a grinder when you’re making small, precise snips. Take your time, measure twice, and you’ll avoid a massive cleanup.
If I mess up a cut or a tile cracks, am I totally screwed, or is there an easy way to fix it?
Look, I’ve definitely cracked a tile mid-cut before. It’s frustrating, but you aren’t screwed. If it’s a single tile, just pop the broken one out with a putty knife, scrape away the old thin-set, and swap in a new one. If you mess up a cut, just grab a spare from your leftover stash. As long as you don’t have a massive gap in the middle of the wall, it’s an easy fix.